Creating Intricate Nail Art: A Step-by-Step Guide

Nail art has evolved into a popular form of self-expression and creativity, offering individuals a canvas to showcase their personality and style. In this tutorial, we will delve into the process of creating intricate nail art, step by step, unveiling the secrets behind stunning designs inspired by the magical world of “Harry Potter.”

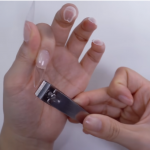
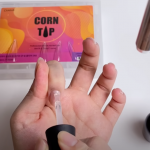
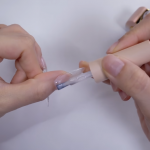
To begin, it’s essential to prepare the nails by trimming and shaping them to the desired length and form. This sets the foundation for the artwork to come, ensuring a clean and polished appearance. Once the nails are shaped, the next step involves applying a base gel to secure nail tips, followed by careful curing and further shaping using a file. This initial stage sets the stage for the intricate designs to follow.

With the nails prepped and shaped, it’s time to unleash creativity by applying base colors. For our “Harry Potter” inspired theme, we opt for hues reminiscent of Hufflepuff, such as yellow and pink gel polish. These base colors provide the backdrop for the enchanting designs to come, adding depth and vibrancy to the final look.

Now comes the exciting part – the artwork. Drawing inspiration from the iconic symbols and emblems of the wizarding world, we embark on creating the emblem of Hufflepuff. Using a combination of black and painting gels, we carefully outline the emblem, ensuring precision and accuracy. Sealant stickers come in handy for achieving crisp lines and intricate shapes, adding an extra layer of detail to the design.

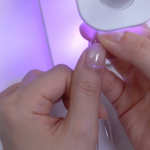
To add dimension and depth to the artwork, we employ a technique involving transparent gel mixed with colored gel and powder. This mixture is applied strategically to certain areas of the design, creating a three-dimensional effect that brings the artwork to life. Each layer is cured to perfection, ensuring durability and longevity.

But the magic doesn’t stop there. No nail art is complete without embellishments. Jewels, chains, and other adornments are meticulously placed onto the nails, adding an extra touch of glamour and sophistication. These embellishments are secured in place using gel, ensuring they stay put and withstand the test of time.

Finally, to seal the deal and protect the artwork, a topcoat gel is applied over the entire design. This not only adds a glossy finish but also ensures durability and longevity, allowing the nail art to stay pristine for days to come.

In conclusion, creating intricate nail art is a labor of love and creativity. With careful preparation, precise execution, and a touch of imagination, stunning designs inspired by beloved themes like “Harry Potter” can be brought to life on your fingertips. So why not unleash your inner wizard and transform your nails into works of art? The possibilities are endless.

53 Stylish Hairstyles for Round Faces: Crafting Flattering Bangs

Bangs! They’re either a hit or a miss. For those with round faces, finding the right bangs can be a challenge. Bangs tailored for round faces not only look great but can also help create the illusion of a slimmer face. They open up a world of hairstyle possibilities, perfect for concealing rounder jawlines and fuller cheeks. If your face is round, opt for bangs that elongate your face shape, giving it a longer or more oval appearance.

Tips for Bangs Suitable for Round Faces:

Amidst the myriad types of bangs to choose from, it’s easy to feel overwhelmed when deciding what’s best for your round face. If you have a round face, your choice of bangs can either accentuate or minimize its roundness. The cardinal rule is to steer clear of straight, blunt lines, as these can emphasize the fullness of your face. Instead, opt for bangs that create angles, such as thick, side-swept, or curtain bangs, which can visually elongate and slim down your face.

Just take a cue from celebrities like Emma Stone, Kirsten Dunst, and Selena Gomez! With the right bangs, you can bid farewell to the “babyface” syndrome and accentuate your cute features.

Of course, these benefits come with a price tag. Maintaining the length of your bangs for round faces requires regular trims every 2-3 weeks. Plus, get ready to incorporate washing and styling your strands into your daily routine.

Before your next hair appointment, explore the plethora of flattering bangs options for round faces!

Curtain bangs are a timeless addition to any woman’s hairstyle

Curtain bangs are a timeless addition to any woman’s hairstyle, adding a face-framing element that exudes classic femininity. Whether parted in the middle or off-center, these bangs resemble the elegant drapes of a theater, offering a sophisticated allure to those who embrace them.

Originating in the 1960s, this retro fringe quickly captivated women’s hearts, and its appeal has endured through the decades. According to Shelby Loos, a stylist from Kansas City, MO, the enduring popularity of curtain bangs can be attributed to their softness, low-maintenance nature, and ease of grow-out. Unlike full fringes, they require less commitment, making them an attractive option for those hesitant to make a drastic change.

However, maintaining the perfect curtain bangs requires regular trims, so it’s essential to schedule regular salon visits once you’ve committed to this style.

Curtain bangs come in various styles, each tailored to complement different face shapes and features. Therefore, it’s crucial to consult picture references and discuss options with your stylist to find the perfect fit for you.

Loos recommends discussing styling techniques and product recommendations with your stylist. Understanding the right tools and products for your hair type and texture can enhance the longevity and appearance of your curtain bangs.

One helpful tip Loos shares is to ensure that your hair dries forward after washing. By positioning your wet bangs where you want them to dry, you can train your hair to set in the desired direction, maintaining the perfect curtain effect. With the right care and attention, curtain bangs can elevate your hairstyle with elegance and sophistication.

Create Stunning Yellow and Purple Gradient Nails for Ultimate Elegance!

Hello everyone! Welcome to the nail art tutorial by Nail Queen! Today, I’m going to show you how to create a fabulous yellow and purple gradient nail design to make your fingertips shine! Without further ado, let’s get started!

Firstly, let’s prep the nails by trimming and buffing them. Apply a base coat to ensure better adhesion of the gel polish. Then, apply the yellow gel polish and cure it.

Next, it’s time for the purple gel polish to make its appearance. Apply it above the boundary of the yellow polish to create a smooth gradient effect. Remember to gently blend the boundary with a gradient brush for a seamless transition of colors.

Don’t forget to repeat the same steps for the other nails to ensure consistency of colors across both hands.

Now, it’s time for the embellishments! Choose your favorite yellow and purple decorations, whether they’re sparkling jewels, gorgeous swallows, or adorable flowers, and mix and match them according to your mood.

Secure the decorations onto the nails with clear gel, arranging them meticulously to create unique nail art designs.

Finally, seal the entire nail with a top coat gel to ensure the decorations stay vibrant and secure without fading or falling off.

After curing, your stunning yellow and purple gradient nails are complete! Feel the charm of your fingertips!

Crafting Stunning Nail Art: Colored Gel, Glitter Stones, and Butterfly Decorations

In today’s fast-paced world, nail art has become a means for many to express beauty and individuality. Whether pursuing simplicity or boldness, the decoration of fingertips can showcase unique personal styles. Today, we’ll take you through a tutorial on colored gel, glitter stones, and butterfly decorations in nail art.

In this tutorial, we first learn how to prepare the nails and apply the base gel. The base gel not only protects the nails but also enhances the adhesion and longevity of the colored gel. Next, we learn how to use colored gel, which is crucial for creating dazzling fingertips. From choosing favorite colors to mastering application techniques, each step aims to make fingertips shine brightly.

Then, we introduce how to add glitter stones and decorations. The addition of glitter stones makes the nails even more dazzling, while carefully selected butterfly decorations add an elegant and romantic touch. Through clever combinations and arrangements, we can create nail art in various styles, from simple to luxurious, from fresh to glamorous, showcasing individual charm.

Throughout the tutorial, we emphasize the importance of using tools and techniques. From brushes to scissors, each tool has its unique function, and proper use can make the nail art process smoother and more efficient. At the same time, we also mention the importance of curing time and cleaning uncured gel, as these details determine the quality and longevity of the final result.

Finally, the tutorial concludes with showcasing the finished product. The stunning art on the fingertips is breathtaking, with sparkling stones complementing exquisite butterfly decorations, showcasing unique beauty. These nail arts are not only symbols of fashion but also displays of personality, allowing everyone to find their unique charm on their fingertips.

In the busy life, nail art brings a breath of fresh air and healing. Whether in the hustle and bustle of weekdays or the leisurely weekend, crafting stunning nail art with colored gel, glitter stones, and butterfly decorations is a delightful experience. Let’s relax and enjoy ourselves, adding a unique brilliance to our fingertips with nail art!

Crafting Exquisite Nail Art: Detailing Taste

Today, let’s delve into the process of crafting exquisite nail art, where every detail shines with taste and personality. Throughout this journey, we’ll utilize various tools and materials, from exfoliating and removing cuticles to artistic embellishments, step by step creating the perfect fingertip masterpiece.

Firstly, let’s address the exfoliation and cuticle removal process. JOUNAIL advises us to gently apply exfoliating cuticle remover to the cuticle area and sides, then delicately separate the edges with a wooden stick, completely removing any excess and filling in gaps with remover. For those using peel-off base gel, effortless removal is possible without soaking. Finally, remember to wipe off any residue and wash hands, preparing for the subsequent steps.

Next, we move on to nail care. JOUNAIL guides us through using a cuticle drill bit to gently separate the cuticle layer from the nail, as well as employing a pointed care drill bit to eliminate dead skin cells. These steps not only enhance the appearance of the nails but also increase the longevity of gel nails, preventing lifting or molding.

Following nail care, it’s essential to disinfect and adjust the oil-water balance of the nails, preparing them for extension and decoration. JOUNAIL mentions the use of a nail peel-off tool and base gel for nail extension, along with tips on selecting the appropriate tip and applying transparent gel. These steps ensure long-lasting nails and maintain their strength and neatness.

Once nail extension is complete, we enter the phase of exquisite artistic decoration. JOUNAIL demonstrates how to use different colors of gel, glitter, and embellishments to create various patterns and designs. From magnetic French tips to tweed art, and from jewels to chain embellishments, each detail showcases craftsmanship and creativity. Finally, using topcoat gel to secure the decorations, ensuring their durability.

Through this process, we learn how to craft exquisite nail art, where every detail speaks of taste and individuality. Thanks to JOUNAIL’s guidance, let’s come together to create endless possibilities on our beautiful fingertips!

Creating Stunning Glass Ball Nails: A Step-by-Step Guide

Have you ever wondered how to achieve those mesmerizing glass ball nails that you see all over social media? Well, wonder no more! In this comprehensive guide, we will take you through each step of the process, from nail preparation to the finishing touches.

Step 1: Removal We start by removing any existing nail polish or extensions. A remover oil is applied to dissolve the peel-off base gel, making the removal process quick and easy. After waiting for a few minutes, the gel is gently removed, leaving behind a clean canvas for the new nail design.

Step 2: Nail Preparation With the natural nails trimmed short, we ensure minimal damage to the nail surface. Any remaining residue is gently smoothed out using a wood file and a sanding block. Cuticle remover is applied to soften and push back the cuticles, followed by thorough cleaning to remove any oil or moisture that could affect the staying power of the nails.

Step 3: Tip Extension For those looking to add length, a half tip extension is applied using a strong base gel. The tip is carefully aligned and pressed firmly to ensure a secure bond. After curing, the tip is trimmed to the desired length.

Step 4: Base Coat and Overlay A clear base gel is applied to provide a smooth surface for the nail design. Thin layers of nude syrup gel and magnetic gel are added for a transparent and sparkly effect. The nail is then overlayed with a mixture of clear gel and reflective glitter gel, creating a plump and glossy finish.

Step 5: Glass Ball and Stone Art Using a hemisphere mold, glass ball parts are created with clear gel and reflective glitter. These are then embellished with stones, pearls, and ball charms to add dimension and texture to the nails. Stone art is meticulously applied using fix gel, showcasing a variety of stones and decorative elements.

Step 6: Final Touches To ensure longevity, a non-wipe top gel is applied to seal the design and prevent chipping. Any remaining uncured gel is carefully removed, and the nails are filed and buffed to perfection. The end result is a stunning set of glass ball nails that are sure to turn heads!

In conclusion, creating glass ball nails is a meticulous process that requires patience and attention to detail. By following these steps, you can achieve professional-looking nails that are both beautiful and long-lasting. So why wait? Get creative and unleash your inner nail artist today!

Mastering the Art: Crafting Exquisite Glass Ball Nails

In the dynamic world of nail artistry, where creativity knows no bounds, a captivating trend has emerged: the creation of glass ball nails. This intricate style seamlessly blends transparency, sparkle, and dimension to produce stunning works of art that adorn fingertips with elegance and sophistication. Let’s delve into the meticulous process behind crafting these mesmerizing manicures, from meticulous preparation to the final flourish.

The journey begins with precise removal techniques. Using a specialized remover oil, peel-off base gel is dissolved, laying the foundation for the transformation ahead. Despite the simplicity of removal, considerations such as staying power and potential drawbacks are carefully weighed.微信图片_20240224161558微信图片_20240224161556

Following nail preparation, the shaping and smoothing ritual ensues. Natural nails are delicately trimmed and filed to perfection, ensuring an immaculate canvas for the intricate design. Every detail matters as the stage is set for the artistry to unfold.

With the nails primed, the creative process unfolds. A delicate interplay of gel overlays, reflective glitters, and magnetic accents takes center stage. Each element is thoughtfully applied to achieve the desired aesthetic, with glass ball parts, stone art, and delicate charms adding depth and dimension to the design.

Yet, the true magic lies in the overlay technique. Layer by layer, each stone, charm, and glitter particle is carefully encapsulated in clear gel, ensuring durability and longevity. This meticulous process, though time-intensive, is essential for preserving the intricate details of the design and ensuring its resilience.

Finally, the finishing touches bring the design to life. A non-wipe top gel is delicately applied to seal the design, enhancing its brilliance and providing a protective shield. The result is a set of nails that captivate with their shimmering allure, evoking the enchanting beauty of treasures beneath the ocean’s surface.微信图片_20240224161552

In conclusion, the art of crafting glass ball nails is a testament to the boundless creativity and skill of nail artists. Through meticulous craftsmanship and unwavering dedication, these intricate designs transform fingertips into dazzling showcases of elegance and sophistication, leaving admirers mesmerized by their exquisite beauty.

The process may be intricate and time-consuming, but the end result is truly breathtaking. Glass ball nails are not just a trend; they are a testament to the skill and artistry of nail technicians around the world. So next time you’re at the salon, consider indulging in this mesmerizing manicure and let your fingertips sparkle with elegance and sophistication.

Crafting Gryffindor-Inspired Harry Potter Nail Art: A Step-by-Step Guide

In the realm of nail artistry, creativity knows no bounds, and JouNail, a prominent nail art influencer, proves this with her unique techniques and imaginative designs. Recently, she showcased a mesmerizing tutorial on creating Gryffindor-themed nail art, inspired by the Harry Potter universe, in a captivating video that left viewers in awe.


The video begins with JouNail warmly greeting her audience and introducing the day’s theme: Gryffindor-inspired nail art. She enthusiastically mentions her plan to decorate the nails with shades of red to complement the festive atmosphere of Christmas.

JouNail starts by meticulously removing the previous nail art, explaining the process of using remover and sharp tools to dissolve and remove the old design without causing harm to the nails. She emphasizes the importance of thorough removal to ensure a clean canvas for the new design.

Next comes the nail preparation stage, where JouNail trims and shapes the nails to her desired length and curve. She demonstrates using disposable nail files to refine the edges and buffing blocks to smooth the nail surface, ensuring a flawless base for the upcoming art.

After nail care, JouNail applies base gel and extends the nails using a technique called full coverage. She carefully selects the size and shape of the tips, opting for a curved tip to match her preference. With precision, she applies gel to the tips and affixes them to the natural nails, creating a seamless extension.

Once the base is set, JouNail proceeds to decorate the nails with Gryffindor-themed elements, including swords, lions, moons, and stars, using a combination of red and gold accents. She meticulously places each decoration, adding intricate details to bring the magical world of Gryffindor to life on her nails.

Finally, JouNail applies top gel to seal the design and cure it for lasting wear. She ensures to cover every aspect of the nail art, paying attention to detail to preserve the brilliance of the decorations.

Throughout the tutorial, JouNail’s passion for nail art shines through as she meticulously crafts each nail, transforming them into miniature works of art inspired by the enchanting world of Harry Potter. Her expert techniques and creative vision captivate viewers, inspiring them to explore their own creativity in the realm of nail art.

In conclusion, JouNail’s Gryffindor-inspired nail art tutorial is a testament to her skill and passion for the craft. Through her meticulous process and attention to detail, she brings the magic of Hogwarts to life on her fingertips, leaving viewers spellbound and eager to embark on their own nail art adventures.

Elegance in Purple: The allure of Chanel Nail Polish

In the realm of beauty and sophistication, few names evoke as much reverence as Chanel. Renowned for its timeless elegance and unwavering commitment to quality, Chanel continues to captivate fashion enthusiasts worldwide. Among its array of luxurious offerings, Chanel nail polish stands out as a symbol of refined glamour and effortless chic.6+

At the intersection of artistry and innovation lies Chanel’s exquisite range of nail lacquers. Among the myriad of captivating hues, the allure of purple reigns supreme. With its regal undertones and captivating depth, purple Chanel nail polish exudes an air of mystery and sophistication.

Whether it’s a deep plum reminiscent of twilight or a vibrant lavender reminiscent of blooming fields, Chanel offers a spectrum of purple shades to suit every preference and occasion. Each coat of Chanel nail polish is more than just a mere adornment; it is a statement of individuality and refinement.

The application of Chanel nail polish is a ritual in itself—a moment of indulgence and self-care. With its smooth texture and flawless finish, Chanel nail polish glides effortlessly onto the nails, leaving behind a lustrous sheen that commands attention.66

But beyond its aesthetic appeal, Chanel nail polish embodies the essence of empowerment and confidence. Like a coat of armor for the modern woman, the striking hue of purple Chanel nail polish empowers individuals to embrace their uniqueness and express their innermost desires with poise and grace.

Whether worn alone as a subtle accent or combined with other Chanel beauty essentials for a complete look, purple Chanel nail polish elevates any ensemble with its understated elegance and timeless allure.66

In a world where trends come and go, Chanel nail polish stands as a timeless symbol of sophistication and style. With its rich history and unwavering commitment to excellence, Chanel continues to redefine beauty standards and inspire individuals to embrace their true essence with confidence and grace. So, the next time you reach for that bottle of purple Chanel nail polish, remember that you’re not just painting your nails—you’re making a statement.